
In this article, we will guide you through the steps to establish a CI/CD (Continuous Integration/Continuous Delivery) pipeline using AWS CodePipeline for a online shop application. This process involves setting up various AWS services, including IAM roles, CodeBuild, CodeDeploy, and Ubuntu-based EC2 instances, along with utilizing S3 for artifact storage. By the conclusion of this tutorial, you will have a fully operational pipeline that automatically deploys your Node.js application whenever you update your code.
Project Workflow Diagram:
Prerequisites
Before we dive in, please ensure you have the following:
- AWS Account: You will need an AWS account with administrative privileges. If you don’t already have one, you can create a free-tier AWS account here.
- Node.js Application: A Node.js application hosted on GitHub. We will be using the feat/awscicd branch of the repository.
- Basic AWS Knowledge: A foundational understanding of AWS services such as IAM, EC2, CodePipeline, and S3.
- Ubuntu EC2 Instance: An EC2 instance running Ubuntu will be used as our deployment target.
Step 1: Create an IAM User and Set Up CLI Access
In this step, we’ll create an IAM user that allows us to interact with AWS services via the command line interface (CLI).
Create an IAM User
- Go to the IAM Management Console.
- Click Users > Add users or Create User
- Enter a username (e.g., codepipeline-user).
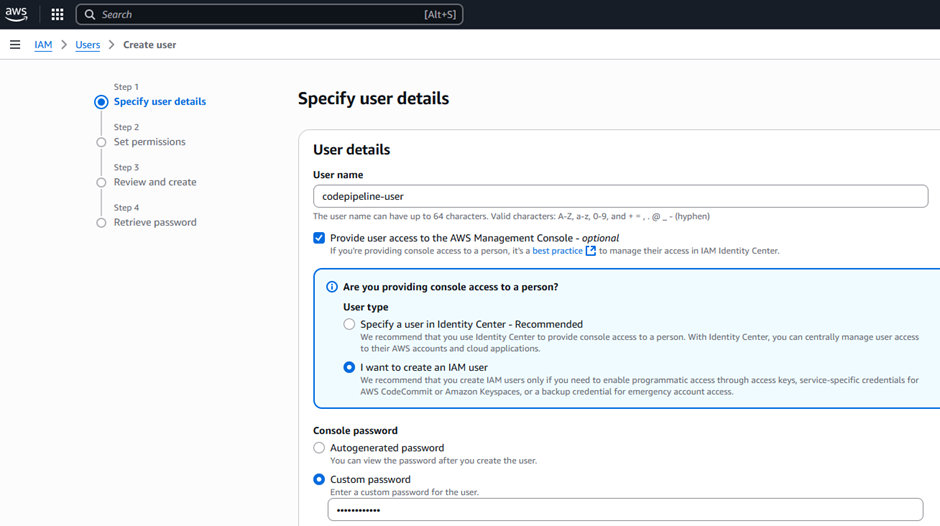
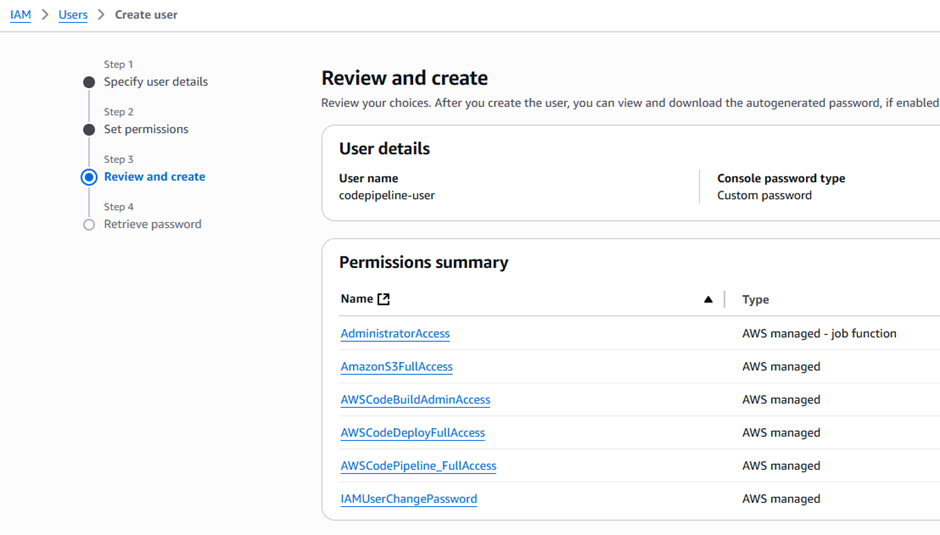
4. Attach the following policies to this user to allow access to necessary AWS services:
- AWSCodePipelineFullAccess: Full access to AWS CodePipeline.
- AWSCodeDeployFullAccess: Full access to AWS CodeDeploy.
- AmazonS3FullAccess: Full access to S3 buckets.
- AWSCodeBuildAdminAccess: Full access to AWS CodeBuild.
- or else provide AdministratorAccess then no need to provide above access.
5. Download the Access Key and Secret Key for later use.
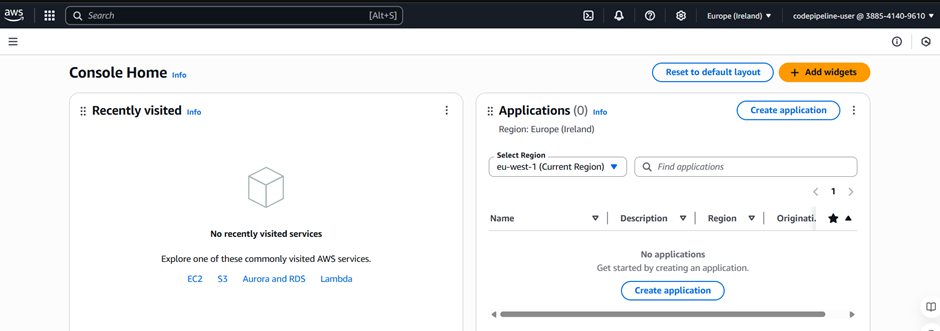
6. Login with that IAM User Now.

Step 2: Set Up and Configure the Ubuntu EC2 Instance
In this step, we will prepare an Ubuntu EC2 instance for deploying the application.
Launching the EC2 Instance
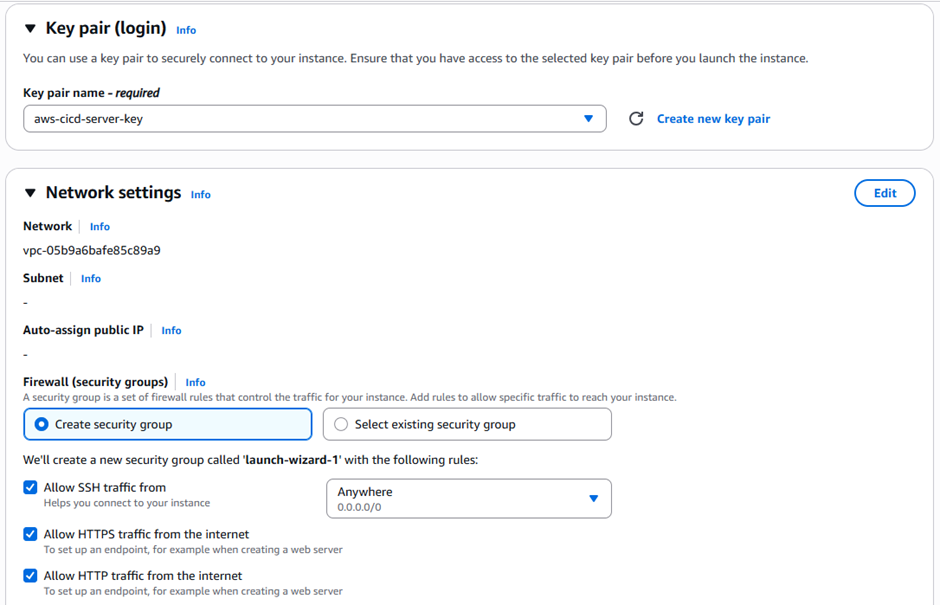
- Open the EC2 Management Console and select Launch Instance.
- From the list of available AMIs, choose Ubuntu Server 22.04 LTS.
- Select the t2.micro instance type, which is eligible for the free tier.
- Either choose an existing key pair or create a new one to enable SSH access to the instance.
- Click on Launch Instance to proceed.

Prepare the Instance
- Connect to your EC2 instance using SSH:

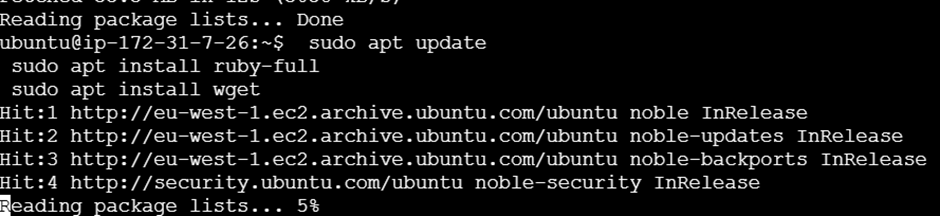
- Update and install dependencies:

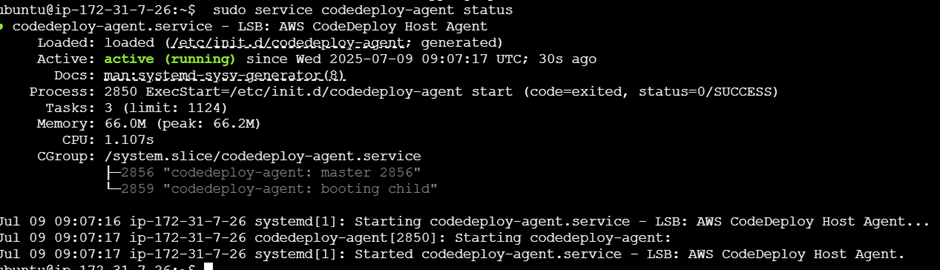
3. Install the CodeDeploy agent:


4. Verify the agent is running:
5. Attach an IAM role with the following policies to the Created Instance:
- Create a IAM role with any name for EC2 instance ,which having this permissions :
- AmazonEC2RoleforAWSCodeDeploy: Necessary for EC2 to interact with AWS CodeDeploy.
- AmazonS3FullAccess: Full access to S3 for artifact storage.
- AmazonEC2FullAccess: Full access to EC2 for managing the instance.
- Go to console and select instance → Actions → security → Modify IAM role and select the IAM role which you have created
- Then restart the agent and check the status of codedeploy-agent:
6. Then restart the agent and check the status of codedeploy-agent:

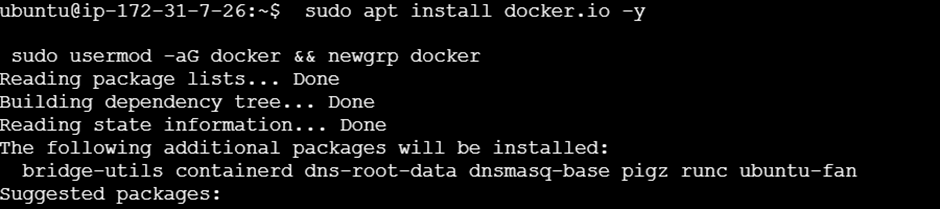
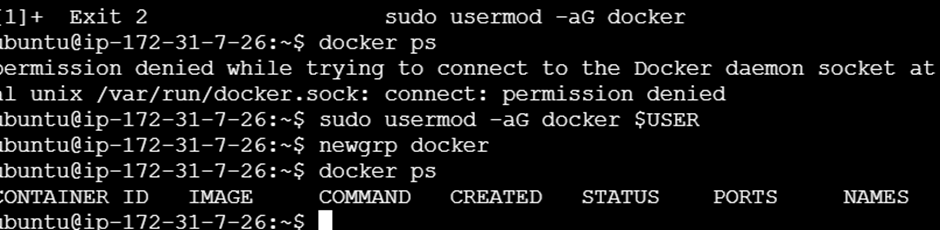
7. Install docker also and setup with that also.
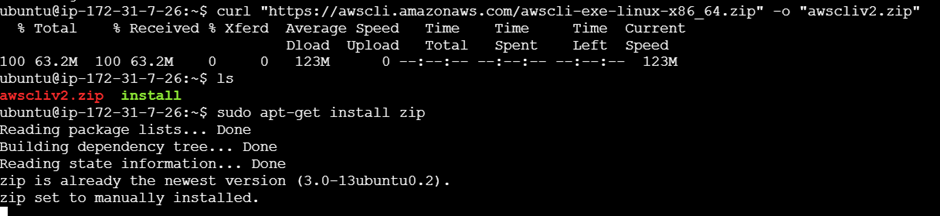
Configure AWS CLI
The AWS CLI allows us to interact with AWS services from the terminal.
- Install AWS CLI on your local machine:

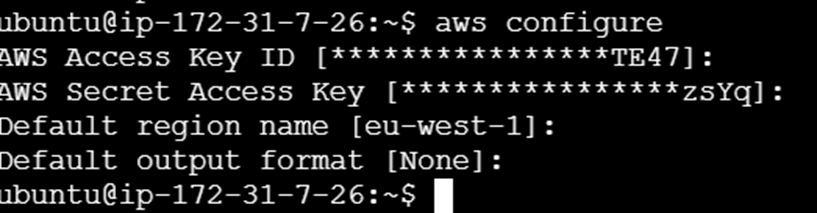
- Configure the CLI:

aws configure
When prompted, enter the Access Key, Secret Key, default region (e.g., us-east-1), and output format (e.g., json).
Step 3: Configure S3 for Artifact Storage
In a CI/CD pipeline, it’s essential to have a location for storing build artifacts. AWS S3 is an ideal solution for this purpose.
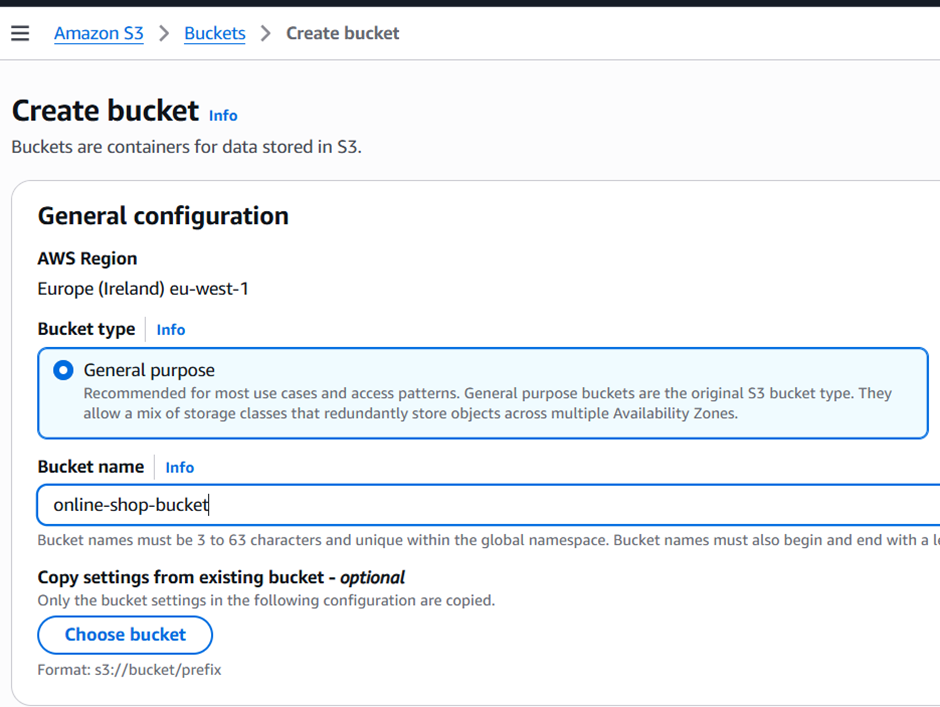
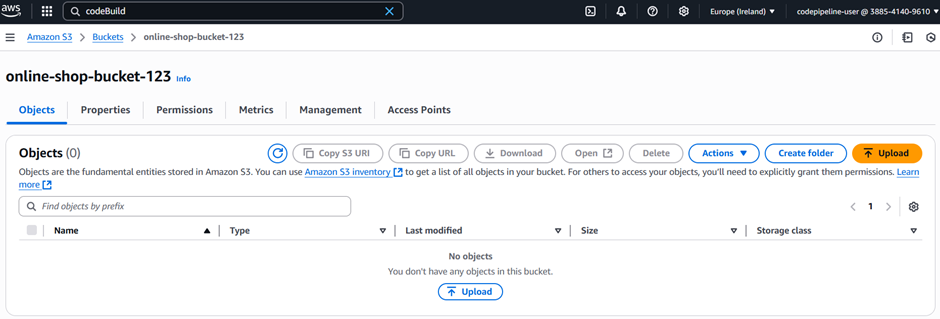
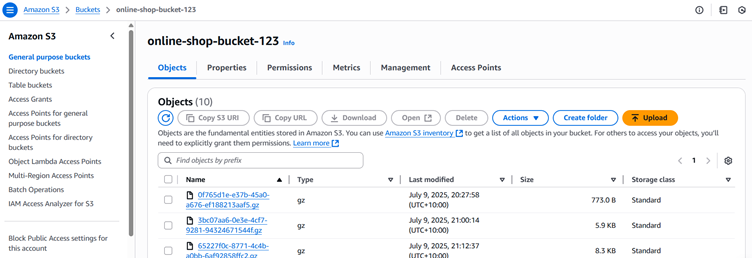
- Navigate to the S3 Management Console.
- Create a new S3 bucket, for example, online-shop-bucket-123.
- Make a note of the bucket name and region for future reference.
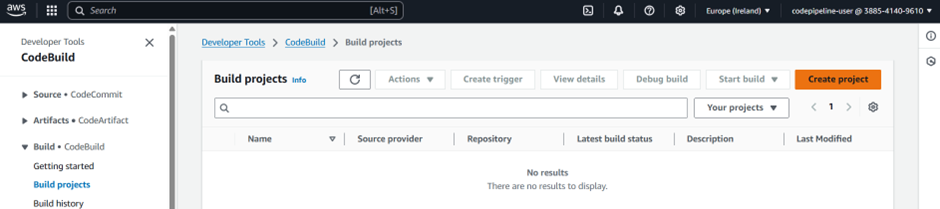
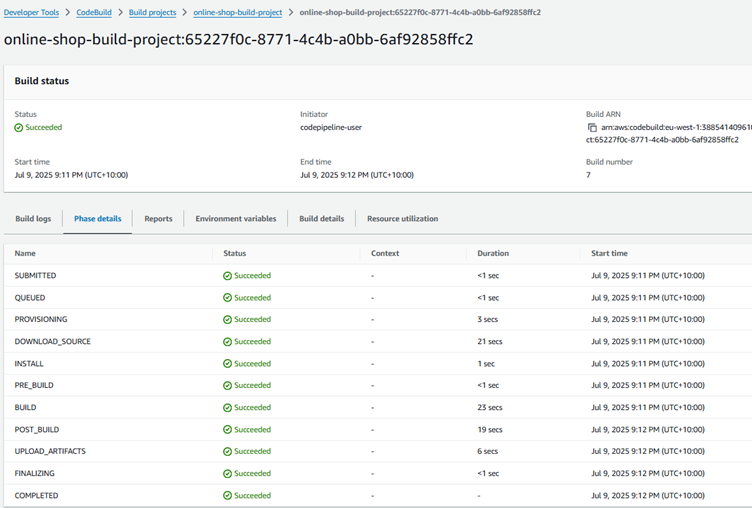
Step 4: Set Up AWS CodeBuild
AWS CodeBuild is responsible for compiling your source code, executing tests, and generating artifacts for deployment. It plays a crucial role in the CI/CD pipeline.
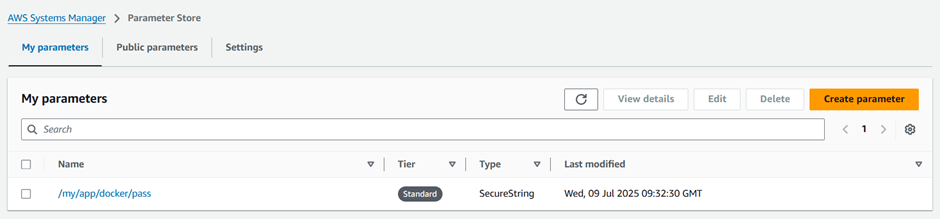
Store Docker Credentials in AWS Systems Manager Parameter Store
- Access AWS Systems Manager:
- In the AWS Console, locate and select Systems Manager under the Management & Governance section.
- Navigate to Parameter Store:
- Under Application Management, click on Parameter Store.
- Create Parameters:
- Click on Create parameter to add new parameters.
- Parameter Names: Set the names for the parameters as follows:
- /myapp/docker-credentials/username
- /myapp/docker-credentials/password
- /myapp/docker-registry/url
- Type: Select SecureString to encrypt the values.
- Values: Enter your Docker registry credentials:
- Username: Your Docker Hub username (e.g., your-dockerhub-username).
- Password: Your Docker Hub password or token (e.g., your-dockerhub-password).
- Registry URL: For Docker Hub, use https://index.docker.io/v1/ or a similar URL.
- Click Create to save each parameter.
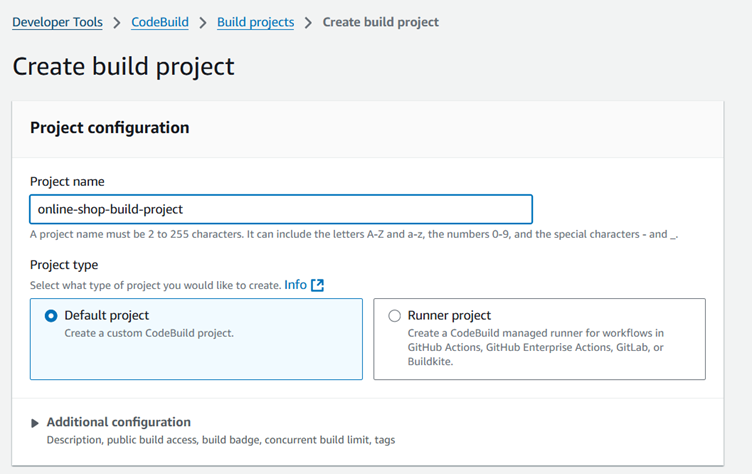
Create a CodeBuild Project
- Go to the AWS CodeBuild Console and click on Create project.
- Enter a name for your project (e.g., Online-shop-build-project).
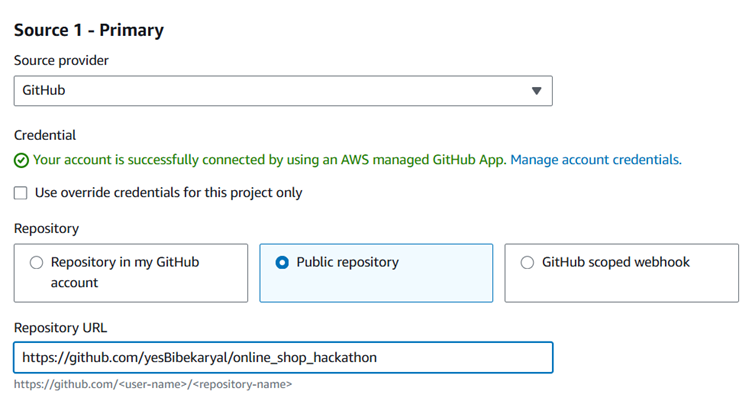
- Under the Source section, select GitHub and link your GitHub repository.
- In the Environment section, choose Ubuntu as the environment image.
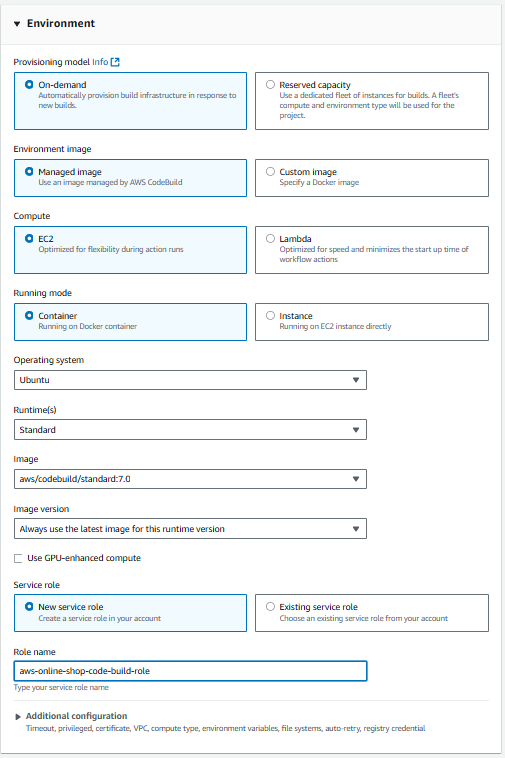
- For the Service role, select the option to create a new role and proceed to create that role.
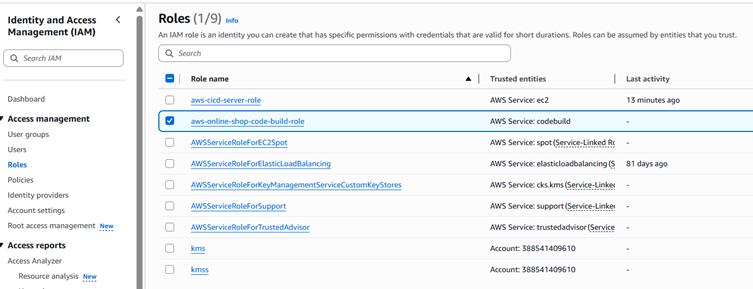
- Assign the role permissions for AmazonSSMFullAccess to allow it to use the environment variables specified in the buildspec file.
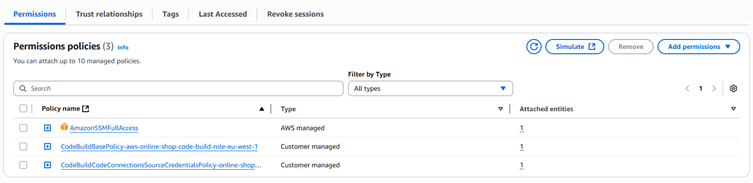
This SSM permission Will help to get code from github and clone it
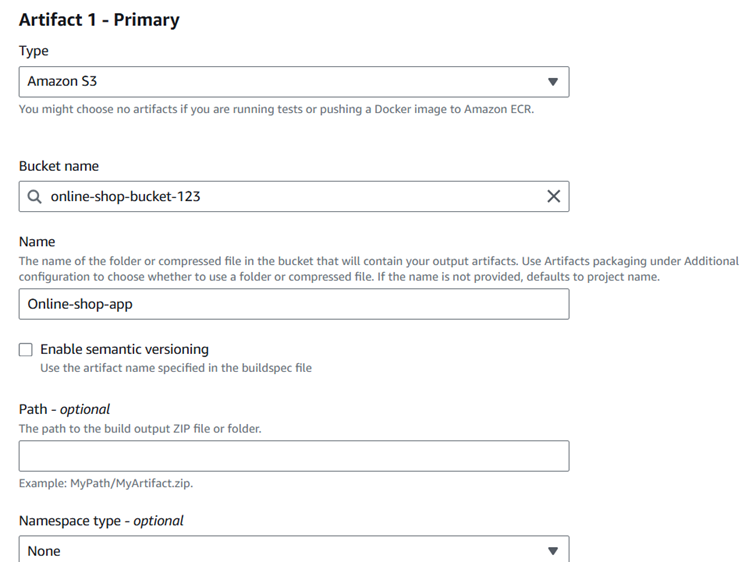
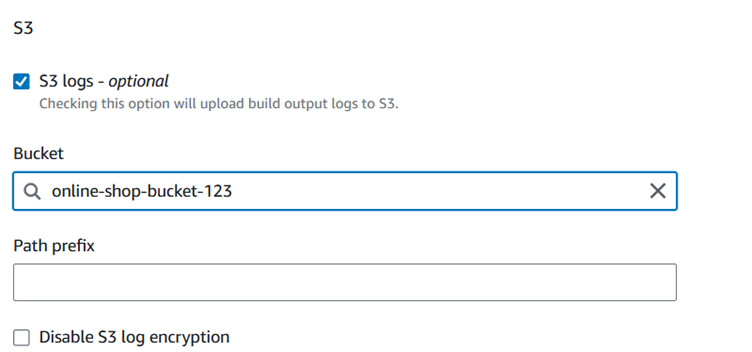
- In the Artifact section, specify the S3 bucket you created earlier.
- Check the CloudWatch and S3 logs for any output or errors.
- Ensure that you include a buildspec.yml file in your repository.
All the buildspec.yml code is given in my Github :https://github.com/yesBibekaryal/online_shop_hackathon.git


Step 5: Set Up AWS CodeDeploy
AWS CodeDeploy automates the deployment of your application to the EC2 instance.
1. Prepare AppSpec and Scripts
In your GitHub repository, include the following configuration files for CodeDeploy:
- appspec.yml: This file defines:
- ApplicationStop: Stops any running Docker containers before starting a new one.
- ApplicationStart: Starts the Docker container from the latest image in Docker Hub.
- scripts/start_container.sh: This script will manage the Docker container lifecycle.
2. Create a CodeDeploy Application
- Open the CodeDeploy Management Console.
- Click on Applications and then Create Application.
- Enter an application name (e.g., Online-shop) and select EC2/On-Premises as the compute platform.
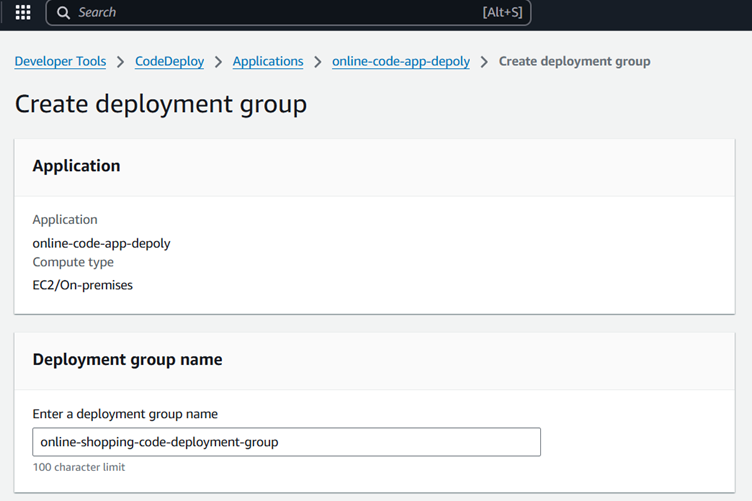
3. Create a Deployment Group
Now, let’s create a Deployment Group for your application:
- Create Deployment Group:
- Under your application in CodeDeploy, click Create deployment group.
- Name the Deployment Group:
- Provide a name for the deployment group (e.g., online-shopping-code-deployment-group).
- Select Service Role:
- Choose the IAM role you created earlier for EC2.
- Deployment Type:
- Select In-place deployment (this updates the application on the EC2 instance).
- Environment Configuration:
- Choose Amazon EC2.
- Add your EC2 instance by either instance ID or tags.

- Deployment Settings:
- Set the Deployment Configuration to CodeDeployDefault.AllAtOnce (this updates all instances simultaneously).
- Enable rollback on failure to stop the deployment if an error occurs.
Create Deployment Under the Deployment Group
Once the EC2 instance and the CodeDeploy Agent are set up, and the application artifacts are available in S3, it’s time to deploy your application using AWS CodeDeploy.
Create a Deployment
- Go to the AWS CodeDeploy Console.
- Select Your Application:
- In the CodeDeploy dashboard, choose the application you created for deployment (e.g., Online-shop-app).
- Select the Deployment Group:
- Choose the Deployment Group you previously created (e.g., Online-shop-deployment-group).
- Create a New Deployment:
- Click on Create deployment.
- Configure Deployment Details:
- Under Deployment type, select In-place deployment (to deploy directly to the EC2 instance).
- For Revision type, select Amazon S3.
- For Amazon S3 location, input the S3 bucket and path where your build artifact is stored, for example:
- S3 bucket: aws-node-todo-app-cicd
- Set Deployment Configuration:
- Choose the Deployment Configuration (e.g., CodeDeployDefault.OneAtATime for one instance at a time or CodeDeployDefault.AllAtOnce to deploy to all instances simultaneously).
- Deployment Group Settings:
- Ensure the correct Deployment Group is selected.
- Optionally, configure alarms and notifications for deployment events.
- Deploy:
- Click Create deployment to initiate the deployment process.
Trigger CodeDeploy
AWS CodeDeploy will utilize the appspec.yml file to manage the deployment. The deployment scripts will handle starting and stopping containers on the designated EC2 instances.
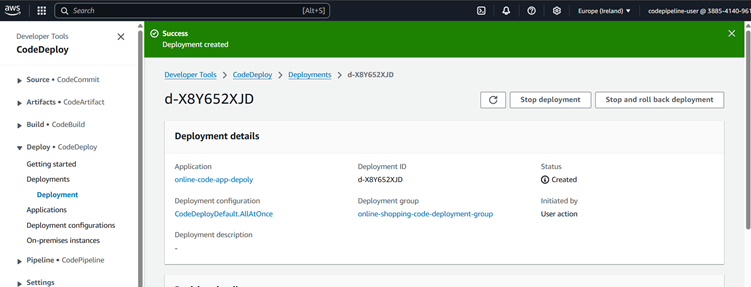
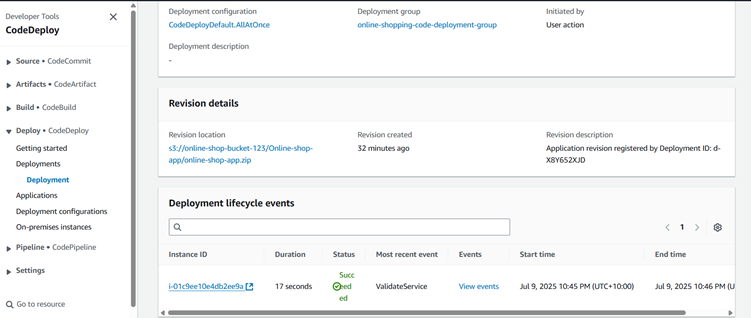
- Deployment Success:
- Modifying Inbound Rule of Instance to Access Web Page on Port 8000:
- Output Image of Application:
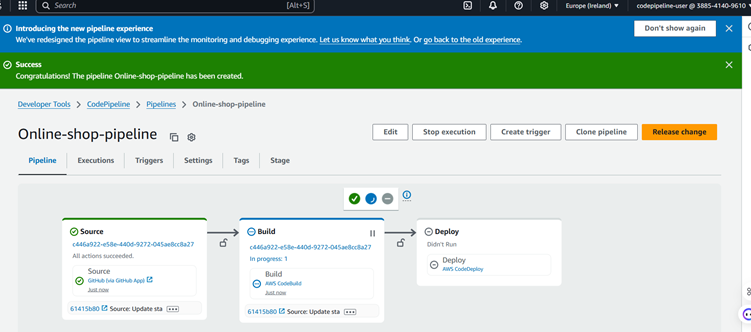
Step 6: Set Up AWS CodePipelie
Next, we will configure AWS CodePipeline to automate the entire CI/CD process. This service will integrate your GitHub, CodeBuild, and CodeDeploy configurations.
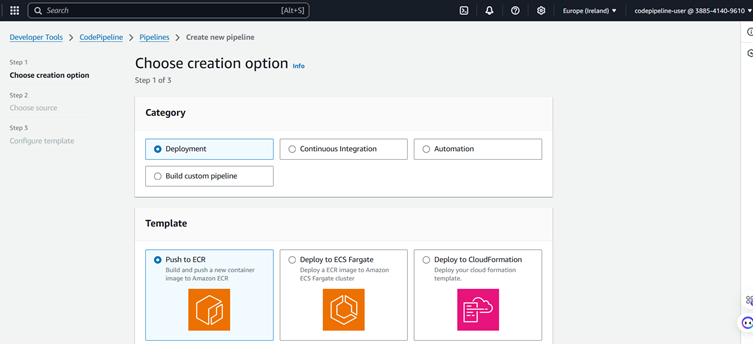
Create the Pipeline
- Open the CodePipeline Management Console and click on Create pipeline. Choose Build custom pipeline.
- Provide a name for your pipeline (e.g., Online-Shop-Pipeline).
Configure Source Stage
- Select GitHub as the source provider.
- Authenticate with GitHub and select your repository (Online-shop-hackathon and branch hackathon).
Configure Build Stage
- Select AWS CodeBuild as the build provider.
- Choose the build project (Online-shop-build-project) that you created earlier.
Configure Deploy Stage
- Select AWS CodeDeploy as the deployment provider.
- Choose the application and deployment group you created earlier.
Finalize and Test
- Review all stages and click Create pipeline.
- Trigger the pipeline by committing changes to the GitHub repository.
- Making a Commit:
- Checking Auto Trigger:
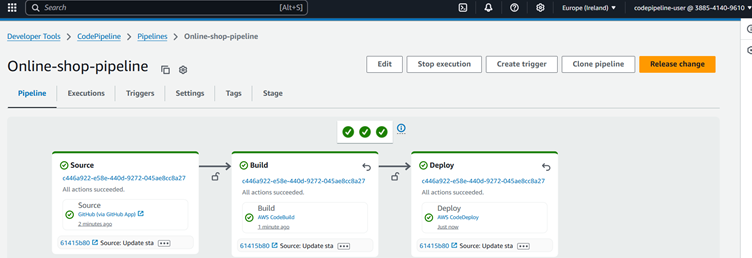
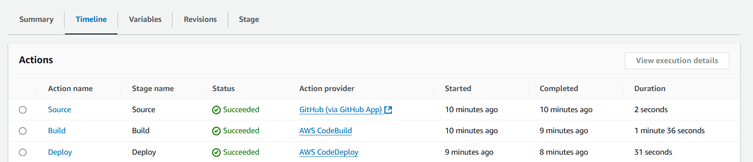
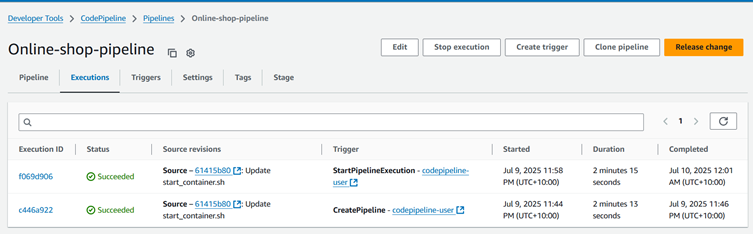
- Pipeline Success:
Monitor the pipeline execution in the CodePipeline console.
Verify the Deployment
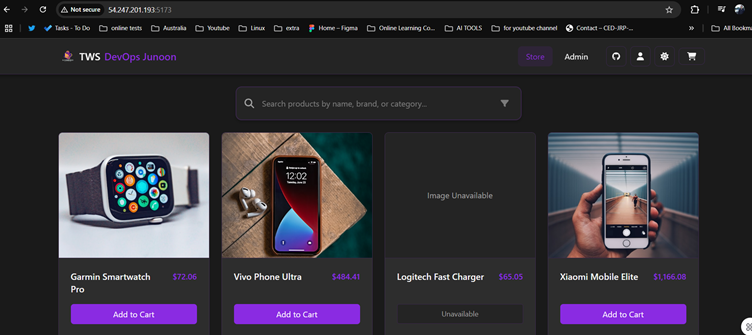
Once the pipeline completes, navigate to the public IP address of your EC2 instance to confirm that the Node.js application is running. The application should be accessible on port 8000.
- New Look of Application:

- Testing Features by Adding a Task:
Troubleshooting Steps for This Project
Environment Setup Issues
- Problem: The task may not function if the environment is improperly set up.
- Solution:
- Double-check the environment variables mentioned in the README.md file.
- Ensure your working directory is correctly set, as any mismatch can cause task failures.
S3 Artifact Path Issues
- Problem: Incorrect paths can lead to issues when retrieving required files from the S3 bucket.
- Solution:
- Verify the S3 bucket path is correct and accessible from your environment.
- Ensure that the S3 bucket permissions allow reading and writing of artifacts.
- Check for typos or missing directory structures in the path.
Script Errors
- Problem: The script may fail due to syntax or logic errors.
- Solution:
- Carefully review error messages, as they typically indicate where the issue lies.
- Check the code in solution.md for syntax mistakes or missing components.
- Verify the scripts/start_container.sh file for the latest image.
Check if the CodeDeploy Agent is Running
- Problem: The task may fail if the AWS CodeDeploy agent is not running on the instance.
- Solution:
- Check if the CodeDeploy agent is installed and running on the EC2 instance:

- If the agent is not running, start it with:

- If the agent is not installed, follow the steps in the AWS documentation to install it.
Log Files and Error Messages
- Problem: Tasks may fail due to hidden errors that are not immediately obvious.
- Solution:
- Check log files for detailed error messages that may indicate the root cause.
- For web-related tasks, use browser developer tools (F12) to check for failed network requests or console errors.
Conclusion
- By following the outlined steps, you have successfully established a fully automated CI/CD pipeline utilizing AWS services such as CodePipeline, CodeBuild, CodeDeploy, and S3 for artifact storage. Now, whenever you push changes to the feat/awscicd branch of your GitHub repository, the pipeline will automatically trigger, build, and deploy your Node.js application to the EC2 instance.
- This CI/CD pipeline facilitates quicker development cycles, ensures more consistent deployments, and reduces the need for manual intervention. You can further enhance this pipeline by incorporating tests, setting up notifications, or leveraging DockerHub for containerized deployments.